TECH
Hidden Haven: Exploring Android’s Recycle Bin Folder

Hidden Haven Android’s recycle bin folder offers a hidden haven to help you recover those accidentally deleted items? While Android OS doesn’t feature a system-wide trash like desktop computers, many built-in and third-party apps have embraced the concept of a trash folder to ease those oh-so-human moments of deletion regret.
Understanding Android’s Trash Mechanism
The Myth of a System-Wide Trash
Contrary to popular belief, Android’s core architecture doesn’t include a universal recycle bin folder. When you delete a file—be it a photo, video, or document—it’s typically marked for deletion and eventually overwritten, rather than shuttled into a safe, sandboxed folder. That said, app developers recognized users’ need for file recovery, which led to the creation of per-app “trash” or “recently deleted” folders in popular ecosystem apps.

App-Specific Trash Folders: Hidden But Powerful
Rather than relying on a universal solution, many Android skins and apps, such as Samsung Gallery, Google Photos, Huawei EMUI’s gallery, Xiaomi Gallery, and the Files by Google app, include their own trash folders. These recently deleted files are typically retained for a limited time—commonly 30 to 60 days—before permanent deletion.
Locating the Recycle Bin Folder in Popular Apps
Samsung Gallery: Your 30-Day Safety Net
On most Samsung Galaxy devices, the Gallery app comes with an integrated trash bin. Deleted photos and videos go to “Trash” (or “Recycle Bin”) and stay there for 30 days, giving you a generous window to restore any mistakenly deleted memories. Navigate to Album → Trash, select your file, and tap “Restore” to recover it to your gallery.
Google Photos: 60 Days of Protection
Google Photos maintains its own “Bin” (often called “Trash”) where deleted images and videos are stored for up to 60 days. This robust retention policy offers extra reassurance. Simply open Google Photos, tap ☰ → Bin, select what you want to recover, and hit “Restore.” After 60 days, however, the app purges its contents—with no way to undo that.
Files by Google: Simple File Management
If you use Google’s file management app, you’re in luck: Files by Google includes a trash feature for non-media items like PDFs, APKs, and other documents. Deleted files remain in the trash for 30 days. Head to Browse → Trash, select the files, and tap “Restore.” This is invaluable for those of us who accidentally delete downloads or cleaned up critical documents.
OEM File Managers: EMUI, MIUI, and OxygenOS
Brands like Huawei, Xiaomi, and OnePlus often incorporate trash features in their native file manager apps. Whether it’s EMUI’s file manager or MIUI’s, these systems usually follow the 30-day holding pattern. Though procedures may vary slightly, the principle remains the same: deleted files are recoverable—until they aren’t.
Recovering Deleted Files: Step-by-Step
Retrieving Images from Gallery or Google Photos
- Launch your Gallery or Photos app.
- Navigate to Trash or Bin via the menu.
- Browse for the inadvertently deleted file.
- Tap Restore—your photo or video will reappear in its original album.
Restoring Documents, APKs & Downloads
- Open Files by Google or your device’s File Manager.
- Go to Trash under the Browse tab.
- Long‑press the file(s) you want to recover.
- Select Restore to move them back to their previous folder.
When No Built-in Trash Exists
Don’t panic—third-party file recovery apps offer a solution. Popular tools like the Dumpster app function as a proactive trash bin, catching future deletions. Meanwhile, advanced paid software like Tenorshare UltData or Geekersoft Android Data Recovery allows you to scan for and recover deleted files—even after bypassing built-in trash—though recovery success depends on how much storage has been overwritten.
Setting Up an Extra Layer of Data Safety
Pre-Install a Trash-Catcher App
Installing an app like Dumpster gives you a continuous local trash setup. It captures all deletions—photos, videos, audio, documents—automatically. With advanced features like cloud backups and scheduled cleaning, it’s a safety net for the forgetful mind.
Embrace Cloud Sync and Backups
Google Drive, Dropbox, and OneDrive offer auto-sync for folders and photos. Google Photos alone preserves your images even after deletion from local storage. For critical documents, enable “Back up & sync” in Files by Google or the Google Drive app, ensuring deleted files can always be restored online.
Optimize Trash Folder Settings
In apps that offer trash functionality, take advantage of settings like:
- Trash retention (e.g., 30 or 60 days)
- Empty trash after X days
- Auto-delete oldest files when nearing storage limits
These features align space management with user needs, ensuring you aren’t hoarding digital clutter unnecessarily.
Third-Party Data Recovery Explained
Dumpster: Real-time Recycle Bin
Dumpster acts as a system-wide catchment for deletions, complete with previews and one-tap restoration. Its built-in backup and cloud export functions make it a prime choice for on-the-go recovery needs.
Tenorshare UltData & Geekersoft
These tools go beyond simple trash catching. They scan internal memory—even root if allowed—to dig up deleted files. Ideal for critical documents or photos you failed to capture elsewhere, though they work best before the system overwrites deleted data.
Caveats and Considerations
Always note that if you continue using your device after deletion—especially saving photos or installing apps—overwriting may render recovery impossible. It’s also crucial to view third-party apps’ privacy policies, because granting access to all your storage is a sensitive privilege.
Best Practices: Avoid Data Disasters
- Regular backups – Auto-sync is a lifesaver.
- Multiple layers – Use both cloud storage and a trash app.
- Immediate recovery – Act fast to recover deleted files.
- Inspect permissions – Review what you authorize apps to access.
- Cleanup routines – Empty trash regularly to manage space and avoid risks.
FAQs
Q: Does Android feature a universal recycle bin folder?
A: No. Android relies on app-level trash mechanisms. Deleted files are flagged and eventually overwritten unless the app offers a recycle bin.
Q: How long do deleted files stay in trash?
A: Retention varies. Google Photos holds items for up to 60 days, while Gallery and Files by Google usually offer 30 days. OEM managers may follow similar timeframes.
Q: Can I recover permanently deleted files?
A: Paid recovery tools like Tenorshare UltData can scan for deleted files before they’re overwritten. Success depends on storage activity since deletion.
Q: What apps support trash or recovery?
A: Popular apps include Samsung Gallery, Google Photos, Files by Google, Huawei EMUI Gallery, and Xiaomi’s Gallery. Third-party apps like Dumpster also provide trash functionality.
Q: Is it safe to grant storage permissions to recovery apps?
A: Most recovery tools require full storage access. Always download from reputable sources and review permissions to minimize privacy risks.
Q: How can I permanently delete a file without recovery options?
A: Use the trash-emptying functions within apps. For Photos or Google files, open Trash/Bin and select “Empty trash” or “Delete permanently.” For advanced wiping, consider encrypted file shredding apps, though they are beyond basic user needs.
Conclusion
Android’s file recovery environment may not mirror the desktop experience, but your hidden haven—the recycle bin folder—lives on within individual apps like Gallery, Google Photos, and Files by Google. By leveraging built-in trash folders, cloud backups, and third-party tools like Dumpster, you can safeguard your photos, documents, and downloads from accidental deletion. And if disaster strikes, swift action with recovery tools can often restore your invaluable data—provided it hasn’t been overwritten.

If you’ve ever been to a concert or sports event where a flame machine roared fire into the air, you know how unforgettable that moment feels. A flame machine doesn’t just produce heat—it produces hype, creating an atmosphere that sparks excitement and energy. But what exactly makes these fire effect machines so popular in 2025? And more importantly, how can event organizers, DJs, or production companies choose the right one?
This guide dives deep into flame machines, from stage flame machines to CO2 flame machines, rentals, safety rules, and their role in modern entertainment. Whether you’re an event planner or just curious, you’ll get everything you need to know right here.
What Is a Flame Machine?
At its core, a flame machine is a special effects device that projects real fire into the air in controlled bursts. Unlike simple lighting effects, these machines combine heat, sound, and visuals to deliver a high-impact moment.
Think of them as the ultimate pyrotechnic flame machine—only safer, customizable, and designed for entertainment venues. Most modern versions are automatic flame projectors, operated via DMX or remote controls, allowing precise timing with music, sound effects, or event cues.
Stage Flame Machine: Bringing Energy to Performances
A stage flame machine is the most common type used in concerts, festivals, and live performances. Positioned on either side of the stage, they shoot flames vertically or at angles for dramatic effects.
Modern units include LED indicators, safety sensors, and programmable bursts so they can sync perfectly with beats. This makes them a favorite for big-name DJs, touring artists, and theater productions.
Quick Tip: Pairing a stage flame machine with smoke or CO2 jets creates a layered effect, making the performance look even more explosive.
Fire Effect Machine: Why Events Can’t Resist
A fire effect machine isn’t limited to music events—it’s also seen at:
- Sports entrances (football, basketball, esports tournaments)
- Weddings and luxury parties (safe, indoor-friendly versions)
- Corporate product launches (for dramatic reveals)
- Theme parks (immersive attractions with special effects)
One event planner summed it up perfectly:
“When the flames hit at the right moment, the crowd doesn’t just watch—they feel it. That’s the magic of a fire effect machine.”
Flame Thrower Machine for Events: Extreme Impact
A flame thrower machine for events is the advanced, high-powered version. Unlike smaller indoor models, these machines shoot flames up to 10 meters high, making them ideal for outdoor concerts and stadium shows.
They’re often combined with pyrotechnics, fireworks, and laser systems to produce a synchronized spectacle. However, due to the higher risk factor, they require special licensing and certified operators.
Indoor Flame Machine: Safe Yet Stunning
Not every venue can handle massive flame bursts. That’s where the indoor flame machine comes in.
These are specially designed for small-scale events like:
- Wedding receptions
- Nightclubs and lounges
- Indoor concerts and theaters
Instead of using high-pressure fuels, many rely on ethanol-based liquids or controlled cartridges, producing shorter, safer flames while still delivering the wow factor.
Outdoor Flame Machine Rental: A Cost-Effective Option
Buying a professional flame machine can cost thousands of dollars. That’s why many event organizers look for outdoor flame machine rental services.
Rental benefits:
- Lower upfront costs
- Access to the latest models
- Trained technicians for setup and safety
- Ideal for one-off or seasonal events
Safety Note: Always confirm that the rental provider is licensed and provides insurance coverage for pyrotechnic effects.
CO2 Flame Machine: Mixing Fire and Fog
A CO2 flame machine is one of the trendiest innovations in 2025. It combines fire bursts with CO2 jets, creating a two-layered effect:
- Fire for heat and color
- CO2 for smoke and dramatic exits
This effect is hugely popular in nightclubs and DJ festivals, where CO2 clouds blast dancers while flames shoot skyward.
DJ Flame Effect: Turning Sets Into Spectacles
For DJs, a flame effect machine is like an extra band member—it makes the music visible. Imagine dropping the bass and having fire erupt in sync with the beat.
In 2025, compact flame machines are specifically designed for DJs. These units are portable, DMX-compatible, and easy to set up at clubs or small festivals.
Pro Tip: Pair your DJ flame effect with LED wristbands or laser beams for a fully immersive crowd experience.
Pyrotechnic Flame Machine: The Classic Choice
The pyrotechnic flame machine has been around for decades but remains a staple in professional event setups. Unlike CO2-based or ethanol flame machines, these rely on gas canisters or pyrotechnic fuel.
They’re capable of producing taller, hotter flames, making them ideal for:
- Stadium shows
- Outdoor festivals
- National events (parades, ceremonies)
But because they carry higher risks, only trained operators should handle them.
Automatic Flame Projector: Smart and Precise
Gone are the days of manually triggering flame bursts. In 2025, most machines are automatic flame projectors.
Features include:
- Remote or DMX control
- Pre-programmed sequences
- Music synchronization
- Real-time flame height adjustment
This automation makes flame machines safer, more reliable, and more impressive in live events.
Flame Effect Equipment: What’s Included in a Setup?
A professional flame effect equipment package usually includes:
- Flame machines/projectors
- Fuel canisters or cartridges
- CO2 or gas tanks (optional)
- Control systems (DMX, remote, or app)
- Safety barriers and extinguishers
When planning an event, always budget for installation, safety staff, and insurance in addition to equipment costs.
Safety and Regulations in 2025
Flame machines are powerful, but they’re also potentially dangerous. In 2025, regulations have become stricter. Key rules include:
- Indoor venues must use certified indoor flame machines only
- Operators require training and safety certification
- Minimum safety distances must be maintained from crowds
- Local permits are often required for outdoor flame shows
Event planners should always work with licensed technicians to ensure compliance.
Real-Life Example: Flame Machines at Sports Events
At a major football final in 2024, organizers used outdoor flame machines at player entrances. The effect was so powerful that it went viral online, with one fan tweeting:
“The flames during kickoff gave me chills—felt like the players were walking into battle.”
This example shows how flame machines do more than entertain—they create emotional moments.
The Future of Flame Machines
With AI and IoT integration, future flame machines will likely:
- Sync automatically with crowd noise levels
- Adjust flame patterns in real-time
- Use eco-friendly fuels
- Be fully programmable through mobile apps
As events become more immersive, flame machines will continue to be at the heart of multi-sensory entertainment
FAQ’s
Are flame machines safe for indoor use?
Yes, but only if you use certified indoor flame machines designed for smaller spaces with safety sensors and controlled flame height.
How much does a flame machine rental cost?
Outdoor flame machine rental typically ranges from $300–$1,000 per event, depending on the machine type and operator fees.
What’s the difference between a flame machine and a pyrotechnic flame machine?
A standard flame machine uses safer fuels and can be automated, while a pyrotechnic flame machine relies on gas or fireworks-style cartridges, producing larger flames but requiring stricter safety measures.
Can DJs use flame machines in small venues?
Yes, compact DJ flame effect machines are available for clubs and private events, but always check local fire regulations first.
Conclusion
The flame machine has evolved from a niche special effect into a mainstream event essential. From stage flame machines to CO2 flame machines and automatic flame projectors, they’ve redefined how audiences experience live entertainment.

If you’ve searched for ways to watch free movies online, chances are you’ve come across huramovies.to. For many users—whether movie lovers, students, or casual streamers—the site promises access to HD films, trending shows, and international content without subscription fees. But with that promise comes some important questions: Is it safe? Is it legal? Are there better alternatives?
This article provides an honest review of huramovies.to, explores its features, compares it to legal streaming services, and highlights safe alternatives so you can make informed choices.
What is huramovies.to?
huramovies.to is an online movie streaming platform that offers access to a wide range of films and TV shows. Users often visit it to find:
- HuraMovies HD movies for free viewing
- International content with subtitles or dubbed versions
- Popular series updates and HuraMovies new releases
- Options for free HD streaming movies without creating an account
While its catalog attracts millions of visitors, it’s important to weigh both advantages and risks before relying on it.
Features of huramovies.to
Wide Content Library
You’ll find everything from Hollywood blockbusters to indie films and Asian dramas.
No Subscription Fees
Unlike Netflix or Disney+, huramovies.to doesn’t charge a monthly fee.
Accessibility
Movies can often be streamed without creating an account.
Flexible Playback
Some versions of the site even advertise a HuraMovies download option, letting users store movies offline.
Is huramovies.to Safe to Use?
This is one of the most common questions: “Is huramovies.to safe to use for streaming?”
- Safety risks: Sites like huramovies.to often rely on ads that may contain malware or phishing attempts.
- Legal risks: Depending on your country, streaming copyrighted content without permission may be illegal.
- User experience: Many reviews mention pop-ups and redirections that can frustrate viewers.
Expert Tip: Use reputable antivirus software and consider legal alternatives for peace of mind.
huramovies.to vs Other Free Streaming Sites
| Feature | huramovies.to | Legal Platforms (e.g., Tubi, Pluto TV) |
|---|---|---|
| Cost | Free | Free with ads or subscription-based |
| Content variety | Broad but pirated | Licensed, safe, high-quality |
| Subtitles/dubbed versions | Available | Available |
| Safety | Risky | Safe and secure |
| Legality | Questionable | 100% legal |
HuraMovies Alternatives in 2025
If you’re searching for huramovies.to alternatives for free streaming in 2025, here are some safe options:
- Tubi TV – Free and legal, supported by ads
- Pluto TV – Great for live TV and on-demand movies
- Crackle – Offers original series and films
- Peacock Free – Popular NBC-owned platform
- Kanopy – Free through libraries and universities
How to Access huramovies.to If It’s Blocked
Some users ask: “How to access huramovies.to if it’s blocked?”
While VPNs are commonly used, always consider the legal implications first. Many regions restrict access due to copyright violations, so exploring legal platforms is the safer route.
What Do Users Say?
In online forums and review sites, huramovies.to website review and user feedback is mixed:
- Positive: Large catalog, no fees, quick updates
- Negative: Annoying ads, safety concerns, legality issues
Expert Insights
- According to Cybersecurity Ventures, unverified streaming platforms are among the top sources of malware infections.
- The Motion Picture Association (MPA) regularly lists sites like huramovies.to under piracy watchlists.
- A study by Statista (2024) shows that over 50% of global viewers prefer ad-supported legal free platforms, indicating a shift toward safer consumption.
FAQ’s
What movies are available on huramovies.to right now?
Mostly Hollywood blockbusters, TV shows, and some international titles.
Is huramovies.to legal in my country?
It depends—many countries restrict unauthorized streaming of copyrighted films.
How to watch HD movies on huramovies.to?
The site usually streams in HD, but risks include ads, pop-ups, and potential malware.
huramovies.to latest movie releases update?
The platform updates with new films quickly, but without licensing.
huramovies.to vs other free streaming sites?
It has more titles than many sites but comes with legal and safety risks.
huramovies.to with subtitles or dubbed versions?
Yes, many films include subtitles and dubbed options for global audiences.
Conclusion
huramovies.to attracts millions with its huge library of free HD movies and shows, but it comes with legal and safety risks. For movie lovers, the smarter option is to explore legal alternatives like Tubi, Pluto TV, or Kanopy, which deliver quality content without risk.
By staying informed and prioritizing safety, you can enjoy movies online without compromising security or legality.

Soft Copy Meaning refers to any document, image, or file that exists in a digital format. Unlike a hard copy, which is a physical printout you can touch and hold, a soft copy is stored electronically—on your computer, smartphone, tablet, or in the cloud.
Why does this matter? Because soft copies are the backbone of modern communication, collaboration, and record-keeping. Whether you’re emailing a contract, sharing a presentation, or submitting an assignment, you’re almost always dealing with a soft copy.
What Is a Soft Copy? The Simple Definition
What is a soft copy? It’s a digital version of any document or file. This could be:
- A Word document saved on your laptop
- A PDF emailed to your boss
- A photo stored on your phone
- An eBook downloaded to your tablet
- A spreadsheet in Google Drive
If you can view, edit, or share it electronically, it’s a soft copy.
Soft Copy vs Hard Copy: What’s the Difference?
The debate of hard copy vs soft copy is as old as the personal computer. Here’s a quick comparison:
| Feature | Soft Copy | Hard Copy |
|---|---|---|
| Format | Digital (PDF, DOCX, JPG, etc.) | Physical (paper, printout) |
| Storage | Computer, phone, cloud | Filing cabinet, desk |
| Editing | Easy, unlimited | Requires reprinting |
| Sharing | Instant (email, cloud, USB) | Mail, hand delivery |
| Eco-friendly | Yes (no paper used) | No (uses paper/ink) |
| Security | Can be encrypted, password-protected | Can be locked away |
In 2025, soft copies are the default for most businesses, schools, and even government agencies.
Real-World Example: Soft Copy in Action
A job seeker recently shared,
“I used to print out dozens of resumes for every interview. Now, I just email a soft copy or upload it to the company’s portal. It’s faster, cheaper, and I can update it anytime.”
This shift from hard copy to soft copy is happening everywhere—from job applications to legal contracts and beyond.
Why Are Soft Copies So Popular in 2025?
Several trends have made soft copies the standard:
- Remote work: Teams need to share and edit documents from anywhere.
- Cloud storage: Services like Google Drive and Dropbox make it easy to store and access files.
- Sustainability: Reducing paper use is good for the planet and your budget.
- Speed: Soft copies can be sent, received, and updated in seconds.
Types of Soft Copies: More Than Just Documents
When people think of soft copies, they often picture Word docs or PDFs. But the term covers a wide range of digital files:
- Text files: DOCX, TXT, PDF
- Spreadsheets: XLSX, CSV, Google Sheets
- Presentations: PPTX, Google Slides
- Images: JPG, PNG, GIF
- Audio/Video: MP3, MP4, WAV
- eBooks: EPUB, MOBI, PDF
If it’s digital, it’s a soft copy.
How to Create a Soft Copy
Creating a soft copy is easier than ever:
- Type it: Use a word processor, spreadsheet, or presentation tool.
- Scan it: Use a scanner or your phone’s camera to digitize paper documents.
- Download it: Save files from the internet or cloud services.
- Convert it: Use apps to turn photos or scans into PDFs or other formats.
How to Share a Soft Copy
Sharing a soft copy is simple and fast:
- Email: Attach the file and hit send.
- Cloud link: Share a Google Drive, Dropbox, or OneDrive link.
- Messaging apps: Send files via WhatsApp, Slack, or Teams.
- USB drive: For offline sharing, copy the file to a flash drive.
Soft Copy Security: Risks and Best Practices
While soft copies are convenient, they come with security risks:
- Unauthorized access: Files can be hacked or shared without permission.
- Data loss: Accidental deletion or hardware failure can wipe out files.
- Phishing: Malicious files can be disguised as soft copies.
Best practices:
- Use strong passwords and encryption.
- Back up important files regularly.
- Be cautious with email attachments and downloads.
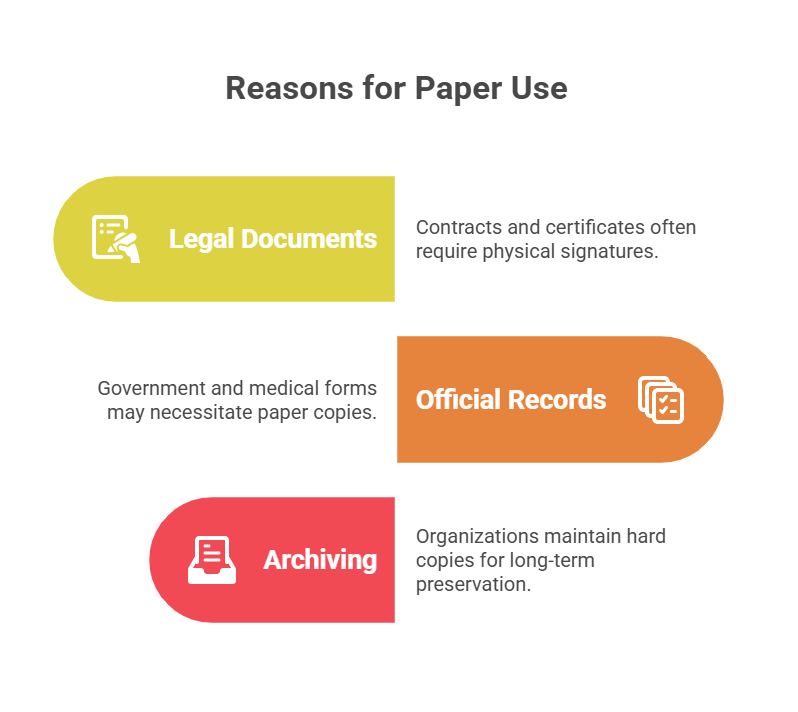
Hard Copy vs Soft Copy: When Do You Still Need Paper?
Despite the rise of soft copies, there are times when a hard copy is still required:
- Legal documents: Some contracts or certificates need a physical signature.
- Official records: Certain government or medical forms may require paper.
- Archiving: Some organizations keep hard copies for long-term storage.
But even in these cases, a soft copy is often created first and then printed as needed.
Soft Copy in Education: The New Normal
In schools and universities, soft copies have transformed learning:
- Assignments: Students submit essays and projects online.
- E-books: Textbooks are now digital, saving money and weight.
- Collaboration: Group projects happen in Google Docs or Microsoft Teams.
A teacher shared,
“I can grade assignments from my tablet, leave comments, and return soft copies instantly. No more lost papers or late submissions.”
Soft Copy in Business: Efficiency and Flexibility
Businesses rely on soft copies for:
- Contracts and proposals: E-signatures make deals faster.
- Invoices and receipts: Digital records are easier to track and audit.
- Reports and presentations: Teams can collaborate in real time.
Soft Copy in Government and Healthcare
Even traditionally paper-heavy sectors are going digital:
- E-filing: Tax returns, permits, and applications are now online.
- Medical records: Patient files are stored and shared as soft copies, improving care and reducing errors.
Pros and Cons of Soft Copies
Pros
- Easy to edit and update
- Instant sharing and collaboration
- Eco-friendly and cost-effective
- Secure (with proper precautions)
- Takes up no physical space
Cons
- Requires devices and internet
- Vulnerable to hacking or data loss
- May not be accepted for all legal purposes
- Can be accidentally deleted or overwritten
Soft Copy Meaning in 2025: The Future Is Digital
Looking ahead, soft copies will only become more important:
- AI-powered search: Instantly find any document, image, or file.
- Blockchain verification: Ensure authenticity and prevent tampering.
- Universal e-signatures: Make soft copies legally binding worldwide.
- Augmented reality: View and interact with soft copies in 3D.
FAQs
Q. What is a soft copy?
A. soft copy is a digital version of a document, image, or file that can be viewed, edited, and shared electronically
Q. How is a soft copy different from a hard copy?
A. soft copy exists in digital form (like a PDF or Word doc), while a hard copy is a physical printout on paper.
Q. Can a soft copy be printed?
A. Yes! You can print a soft copy to create a hard copy whenever needed.
Q. Are soft copies secure?
A. Soft copies can be secure if you use strong passwords, encryption, and regular backups. Always be cautious with sharing and storing sensitive files.
Real-Life Example: Soft Copy Saves the Day
A small business owner lost her laptop to a coffee spill. Luckily, all her invoices and contracts were saved as soft copies in the cloud. She accessed them from her phone and kept her business running without missing a beat.
How to Organize and Manage Soft Copies
- Use folders and clear naming conventions
- Back up files to the cloud and an external drive
- Regularly delete outdated or duplicate files
- Use document management software for large collections
Hard Copy vs Soft Copy: Which Is Better?
For most uses in 2025, soft copies win on speed, convenience, and sustainability. But for legal, archival, or official purposes, hard copies still have their place.
Final Thoughts
Understanding soft copy meaning is essential in our digital world. From job applications to medical records, soft copies are everywhere—and knowing how to create, share, and secure them is a must-have skill.
-

 BLOG7 months ago
Ditto NYT Crossword Clue Explained Clearly
-

 TECH9 months ago
Soft Copy Meaning: Powerful Digital Advantage
-

 BUSINESS10 months ago
Toyota vs Honda: The Battle of Bulletproof Reliability
-

 BUSINESS10 months ago
Unlock Bulk Success with Amazon Business Wholesale
-

 TECH10 months ago
Blue Android Phone: Single Camera Simplicity
-

 BLOG10 months ago
Invisible String: The Unseen Threads That Connect Us
-

 HEALTH10 months ago
Hormone Health for Men: Signs, Solutions, and Staying Proactive
-

 FASHION10 months ago
Style Your Tech: Custom HP Notebook Cover Skins for a Sleek Look